


The Soybean Saga – Part 1 – Simple Way for Homemade Fresh Soy Milk – How to Milk the Soy Beans

Cooking Diary – Log 8 – 27.05.2012

Homemade Soymilk
I am back. 🙂
This time I had been gone for 3 days. Wow! Miss my blog and you guys much. As an apology for my absence, I decide to do another saga about one of my favorite ingredients: Soybean.

Precious Little Beans
What can be made from these little yellowish beans, you wonder? The answer is quite a lot. In this saga, I would like to focus in 3 main things: homemade Soy milk, Tofu and kinds of it, and what to do with the leftover Soy pulp (Okara).
As a Vietnamese, I used to consume a lot of soybean products back home. When studying in Finland, of course, I could not shake that old good habit out of my system. You are wondering again, why should I make tofu while I can simply buy those in my nearby supermarket?
First, making your own soy milk and tofu are HUGE money savers. Before learning to make these at home, I have to buy them, regularly. Here in Finland, 250g of tofu or 1 liter of drinkable soy milk costs about 2 euros. Guess how much it cost with homemade tofu and soy milk? Here is the math. I bought each 1kg bag of dried soybean in an Asian store for 3.5 euro. Every liter of homemade soy milk, or 250g of firm tofu is made from 100g of dried soybeans, which cost like what? .35 euro! It is not a typo, 35 cents, for 1l of soy milk and 250g of tofu, comparing to 2 euros = 200 cents store bought stuff. That’s is some big difference.
Secondly, the homemade results are very much nicer than anything you can buy, very, very much nicer. The tofu I made is so good; I can just eat it plain with a dash of soy sauce. And the homemade soy milk? No need to ask! Once I can make it myself, I could never find any commercial soy milk I could stand to drink. 🙂
Update:Check it out, My Homemade Tofu and Everything Related Recipe. One more thing I love about homemade goodies is that I am in total control of the final products. If I want silken tofu, I stop at silken tofu stage. If I want soft tofu, I just press less water out of the mold, and the same goes with firm tofu. Plus, making soy milk at home is a free and very effective workout for your arm muscles. 😀

Homemade Soymilk
Vegans and people who are lactose intolerant appreciate soy milk as a dairy-free substitute in milkshakes, puddings, soups, and creamy sauces. Soy milk contains fiber; it’s a good source of protein, low in saturated fat and cholesterol-free. Many reasons to enjoy it! In this first post, I will discuss about soy milk and how to make it your own at home. 🙂
Here we go!
——————————————-
Ingredients
(Make 2 liters)
200g dried soybeans
2 liters water
Recommended Utensils
1 pot of 4-liter capacity
A blender
A heatproof spatula
A 50x50cm very fine and strong cheese cloth, or cotton muslin, or other porous fabric
A strainer
——————————————-
Instructions
Step 1: Wash the dried soybeans; pick out any discolored bits, stones and broken beans.
Soak the dried bean with cool water for at least 4 hours to maximum 6 hours if you wish to turn it into tofu (longer soaking time will affect your tofu texture), or maximum 12 hours if you just want to enjoy a cup of fresh soy milk. 🙂 I find that over-soaked beans result in rather flavorless soy milk. 😦
If you are in a hurry, boil a pot of water, then take it off the heat. Then soak the beans in it while letting the water cool down completely, about 2 hours. I do not recommend rushing through the process by using this shortcut. I suppose it does have affect on the final tofu product. But if you just want soy milk out of this, and really, really in a hurry or craving, you can do if you want to. Again, not recommended.
Here are the beans before soaking.

Before soaking
And after soaking.

After soaking
They almost triple in volume, you see? One way to test if your beans are OK to proceed is to bite into it. Sufficiently soaked soy beans should be soft enough to bite through easily. Do not swallow the raw bean, though.
Drain the soybeans and rinse with water.
Step 2: After soaking the soybeans, you need an electric stand blender for this step. Pour half of the soaked beans into the tube together with 0.5l of warm water. Remember; always use warm (rather hot – about 50 degree Celsius) water to process the raw soybeans, not cool water to avoid the little bitter taste in your final homemade soy milk product.

Before processing
Process very well, at high speed for 5 minutes; stop at 2-minute interval to prevent the motor to get overheated.

After processing
While the first batch of bean is being processed, set up a strainer like this: a big pot under, top with a strainer lined by the prepared clean cloth.

My strainer system
Step 3: Now 5 minutes are up, rub the soybean mixture between your fingers to test if it is done. It should feel smooth. If you feel grainy, process it 1 or 2 more minutes.
When you reach to desired texture. Pour it through your set up strainer system. Now prepare the second batch by putting the other half of the soybean into the blender tube with another 0.5l of warm water, process as before.

Pour the soy mix over the strainer system
While the second batch is being processed, it is time for some arm muscle workout! 🙂 Are you ready?
OK, first, collect all corner of the cloth to one end; twist it very tightly at the opening to prevent the soybean mixture to ooze out. Now using both hands to squeeze (REAL hard) to extract all of the raw soy milk out of the mixture. Squeezing, keep squeezing; you are almost done.

Working out
There, the last drop of soy milk. 🙂 Wait! Don’t be happy just yet. We still have 3 more times to go. 😀 And the messy background of above picture is near my kitchen sink. It always like that when I play with soybean. 😛
Step 4: After this, you will have 0.5l of soy milk and the soy pulp. Don’t throw the pulp away just yet! There is still a lot of milk that can be extracted from that, and the more you squeeze and process the beans, the more nutrients will come out of it, into your soy milk.

Soy pulp
Now put it into a bowl, dilute the pulp with another 0.5l of warm water.
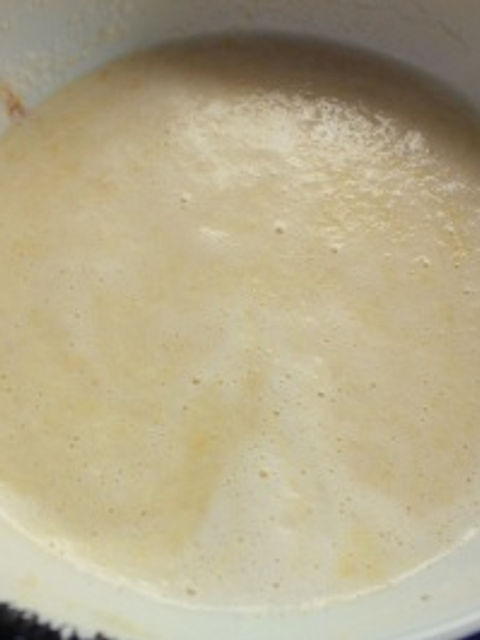
Dilute the pulp
Step 5: Set up the strainer system again for the second batch. It should be in the desired texture by now. Pour it over the strainer.
The blender tube is empty now. Pour the first pulp batch into the blender, process for 5 minutes.
Continue the whole twisting – squeezing work out like the first batch with the second batch of soy mixture.
Step 6: Put the pulp of the second batch in the bowl, dilute with another 0.5l of warm water.
Strain the first pulp patch out of the blender, into the system. Pour the second pulp batch into the empty tube, process for 5 minutes while squeezing milk out of the first pulp batch.
After that, put the final pulp for pulp batch 1 into the bowl. Doing the work out the 4th time, squeezing milk out of the second pulp batch. Put the final pulp for pulp batch 2 into the bowl together with final pulp of pulp batch 1. 🙂
I will summarize the whole milking process from step 2 to step 6, here:
00:00 to 00:05 (First 5 minutes): Process Soy batch 1, half of the soybean with 0.5l water – Set up the strainer system.
00:05 to 00:10: Pour the Soy batch 1 into the strainer – Process Soy batch 2 – Milk the Soy batch 1 – Dilute pulp from Soy batch 1 in a new bowl with 0.5l of water (Pulp batch 1)
00:10 to 00:15: Pour the Soy batch 2 into the strainer – Process Pulp batch 1 – Milk the Soy batch 2 – Dilute pulp from Soy batch 2 in the bowl with 0.5l of water (Pulp batch 2)
00:15 to 00:20: Pour the Pulp batch 1 into the strainer – Process Pulp batch 2 – Milk the Pulp batch 1.
00:20 to 00:25: Pour the Pulp batch 2 into the strainer – Milk the Pulp batch 2.
After all that, you will have these: 1 bowl of soy pulp and 2 liters of soy milk. Don’t throw the pulp (Okara) away. Is maybe even more nutritious than the soy milk. It is very high in fiber and full of protein. At the very least, it makes a terrific addition to your compost pile. It will be great for later uses, which I will explain later in some next posts.

After working out
If there is foam in your soy milk surface, simply skim it away.

Skim the foam
A note here is that never fill the pot with soy milk more than half of it because the boiling, the soy milk does have the tendency to foam up, and easily boil over.
Step 7: Now with the soy milk pot on the stove, turn the heat to medium high (level 4/6 in my stove). Cook the milk for approximately 30 to 45 minutes with constant stirring (Beware – this milk is easily burned) using a wooden spoon or heatproof spatula until the milk boils rapidly. If there is foam, skim it. Stir the soy milk in one direction every 25-30 seconds. Make sure there is no soy milk stuck at the bottom. If it is stuck, use the spatula to remove it.
When the soy milk starts boiling rapidly, turn down the heat to low and keep the pot on for another 10 minutes, keeping it at a boiling level. At this time, you only need to stir the soy milk once in a while. The soy milk may also rise very quickly. If it does, take the pot off the stove for about 30 seconds and put it back afterwards. It may rise about 3-4 times.

Boiling Soymilk
You want to make sure that the soy milk is fully cooked, as raw soybeans/soy milk contain a factor known as a trypsin inhibitor. Essentially, this means that the human body cannot properly assimilate the protein contained in the beans/milk unless they are well cooked.
And there you have it: Homemade soy milk! 🙂
——————————————-
There is another way to make soy milk. It is to process the soaked beans with about 0.5l of water into a thick, smooth paste, while boiling the rest 1.5l of water in a big pot. After that, pour the soy paste into the boiling water.

Cook the mixture for a good 45 minutes until rapid boiling, and then lower the heat and let simmer for another 10 minutes. Then, strain the cooked soy mixture over a cloth lined strainer, squeeze the soy milk out of the pulp.

And you are done. It is less time consuming than my way, but I do not make soy milk this way, because:
1) As this mixture heats, it will foam up really a lot, and may very likely to boil over and cause a real mess in your kitchen if you don’t have a huge enough pot or be careless about it for 1 second.

Look how this foams up!
Look at my mess once I tried this method.

2) You might need to wear heat-resistant rubber gloves to squeeze the freshly cooked soy milk from the pulp because it is boiling hot, therefore, high risk of burning yourself there. I am very easy get burned, so I rather do a little more work, and spare myself from it!
3) The flavor and smell of the soy milk is very powerful, and too grassy for my taste. Soy milk made my way has milder smell, almost nutty and very enjoyable flavor to my taste.
But if you want to, you can totally try it out.
——————————————-
I like my soy milk plain, with all its best, maybe with a spoon of sugar or two, sometimes with maple syrup.
If you want to enjoy plain soy milk like me, let it cool down to room temperature, bottle it, chill it, pour it into a glass or cup, stir in enough sugar, and bottom up!

Homemade Soymilk
OK, that’s almost it for today, good luck in your kitchen.

Homemade Soymilk
Stay tuned for the next post in the Soybean Saga. 🙂 (I still smile every time typing this word “saga”, sound too much like Twilight). In the next post, I will describe my way of making tofu in my kitchen. 3 best things about my method:
1) It is easy to follow with detailed instruction and pictures at every step. I have tested making tofu with many different method without many successes
2) Firstly out of this method, you can have silken tofu to enjoy, either as Kinugoshi (Japanese for silken tofu) with a dash of bonito flakes, soy sauce or ponzu sauce, freshly grated ginger, finely chopped cucumber, chopped scallion as a savory dish; or as sweet dessert like Tau Fu Fa (Chinese for soymilk custard in ginger syrup sauce) and Tàu Hũ (Vietnamese for the same thing).
3) Secondly out of this method, you can enjoy normal and firm tofu as sold in the supermarket if you follow with next steps.
Excited yet? 🙂
See you next time,
Rose,



Comments